Using the Register
The register is a daily attendance system that helps you track which children are present, record check-in and check-out times, manage absences, and add notes for each child. This guide will walk you through all the features of the register page.Overview
The register page displays all children scheduled to attend on a given day, organized by room. It provides real-time attendance tracking and allows staff to:- Check children in and out
- Record and edit attendance times
- Add or modify attendance notes
- Mark absences (holiday, sickness, or other)
- View live attendance counts by age group
- Filter children by room
- Add new bookings
- View detailed child profiles
Selecting a Date and Room
Date Selection
At the top of the register page, you’ll find a date picker that allows you to select which day’s register you want to view.Room Filtering
You can filter the register to show only children from a specific room using the room selector dropdown.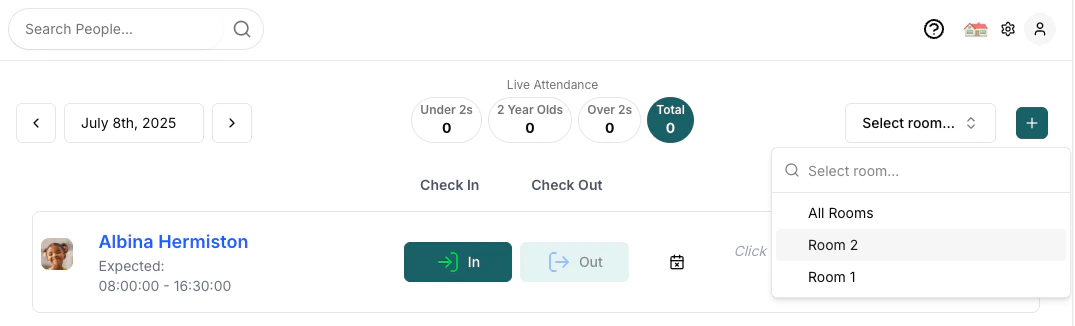
Checking Children In and Out
Checking In
When a child arrives, click the “In” button next to their name to record their arrival time. The system will automatically record the current time.
Checking Out
When a child leaves, click the “Out” button to record their departure time. The “Out” button is only enabled after a child has been checked in.Editing Check-in/out Times
If you need to adjust a recorded time:- Click on the time that needs to be changed
- An editable time input will appear
- Set the correct time
- Press Enter or click outside the input to save the change
Adding and Managing Notes
You can add notes for each child’s attendance record:- Click on the notes area that says “Click to add notes…”
- Type your note in the text area that appears
- Click outside the text area or press Tab to save your note

Managing Absences
Recording an Absence
If a child will not be attending, you can record their absence:- Click the calendar icon with an X (in the column between check-out and notes)

- Select the absence type (Holiday, Sickness, or Other)
- Set the start and end dates for the absence
- Choose whether the absence is chargeable (see below)
- Add any relevant notes
- Click Save
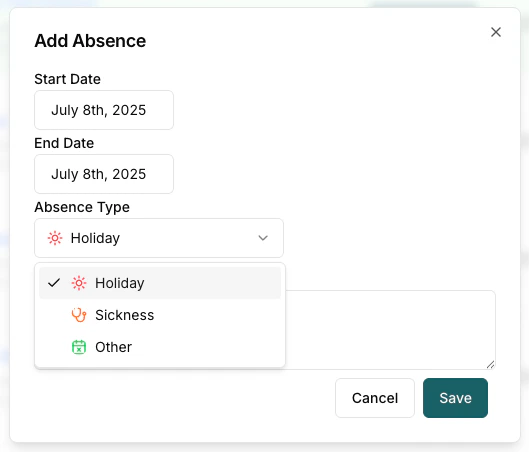
Chargeable vs Non-Chargeable Absences
When recording an absence, you can specify whether it is chargeable:- Chargeable absences: The parent will still be invoiced for the session. Use this for planned absences where the place was held (e.g., family holiday during term time).
- Non-chargeable absences: The session will not be invoiced. Use this when the parent should not be charged for the absence.
This setting is particularly useful during holiday periods where parents choose not to use their funded days. If a parent notifies you they won’t be attending a scheduled session, you can mark it as a non-chargeable absence to ensure they aren’t invoiced for that day.
Editing or Deleting an Absence
To modify an existing absence:- Click on the absence indicator (shows the absence type)
- Update the details in the dialog
- Click Save to update or Delete to remove the absence
Adding New Bookings
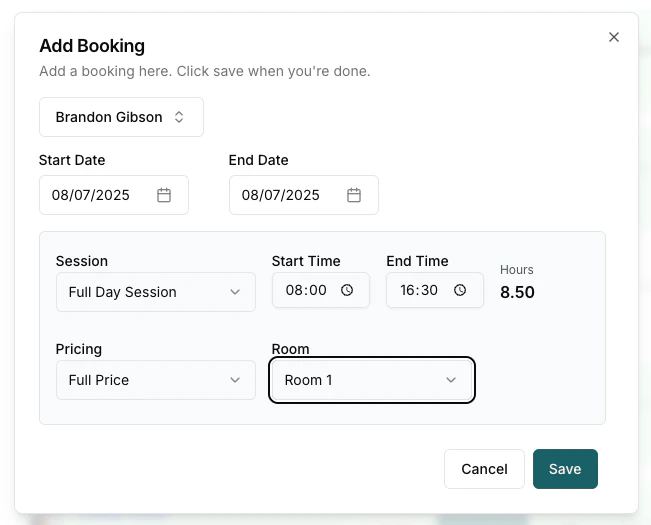
Managers can add a new booking for a child who isn’t already scheduled for the day:- Click the ”+” button in the top right corner

- Search for and select the child you want to add
- Complete the booking details including time and session
- Click Save
Viewing Child Profiles
You can quickly access a child’s detailed profile directly from the register:- Click on the child’s name
- A side panel will open showing the child’s full profile
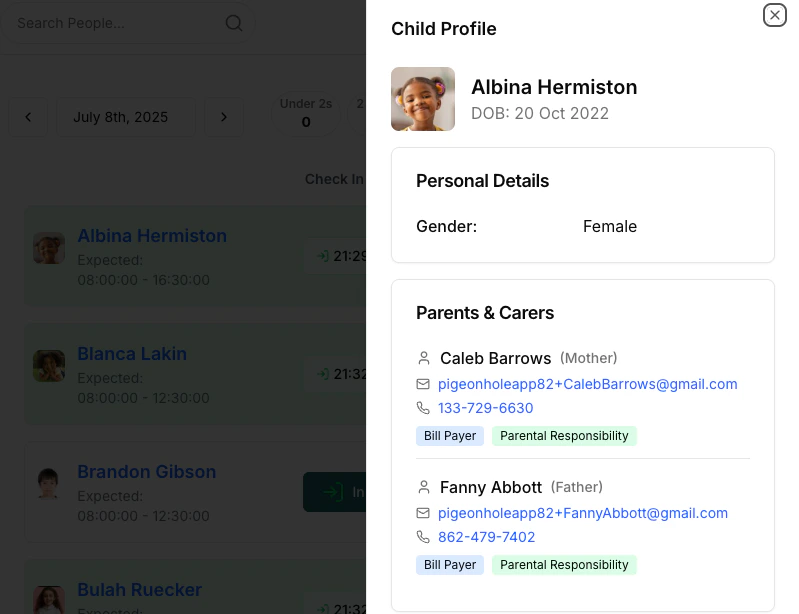
- Personal details (DOB, collection PIN)
- Parent and carer contact information
- Address
- Health information (allergies, health notes)
- Attendance details (key person)
- Any custom attributes
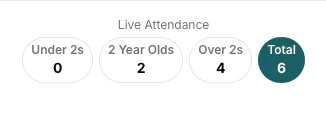
Live Attendance Component
The register includes a live attendance counter that shows:- Number of children under 2 years old currently checked in
- Number of 2-year-olds currently checked in
- Number of children over 2 years old currently checked in
- Total number of children currently in attendance
Downloading the Register
You can export the register as a CSV or PDF file for record-keeping, sharing with inspectors, or offline use.How to Download
- Click the Download icon (top right of the register page).
- In the dialog that appears, configure the export:
- Date Range: Defaults to the current month. Use the arrow buttons to move between months, or click the date range button to pick a custom range. The range cannot exceed 41 days.
- Room: Filter by a specific room, or leave as All Rooms to include every room.
- Format: Choose CSV (spreadsheet) or PDF (printable register sheet).
- Choose any additional columns to include:
- Include allergies — adds each child’s allergy information
- Include health notes — adds health/medical notes
- Include dietary requirements — adds dietary information
- Include empty notes row (PDF only) — adds a blank row under each child for handwritten notes
- Click Generate.
- Once the file is ready, click Download CSV File or Download PDF File to save it.
Large date ranges may take a few seconds to generate. The dialog will show a spinner while the file is being prepared.
Special Features
Birthday Indicator
If it’s a child’s birthday, a cake icon will appear next to their profile picture, making it easy to identify and celebrate birthdays.Color-Coding
The register uses color-coding to help you quickly identify each child’s status:- White: Not checked in
- Green: Checked in
- Blue: Checked in and out
- Gray: Marked absent